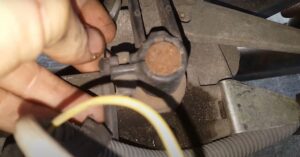
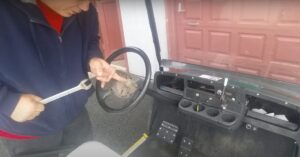
How To Adjust Golf Cart Brakes?
Ready to conquer the task of adjusting your golf cart brakes? You’re not alone! This seemingly daunting mission is actually easier than you might think. With a bit of guidance, anyone can do it, even if you’re not mechanically inclined!
Adjusting golf cart brakes involves tightening or loosening the brake cables. It’s as simple as locating the brake adjustment nut and turning it until your brakes respond optimally.
Want to feel confident tackling this on your own? Stick around and we’ll walk you through each step in an easy-to-understand way. By the end, you’ll be ready to take control of your golf cart’s braking system with ease!
Key Takeaways
- Properly adjusting golf cart brakes ensures optimal safety and performance.
- Regular maintenance of brake adjustment prevents unnecessary wear and tear.
- Familiarize yourself with the specific brake system of your golf cart before attempting adjustments.
- Seek professional assistance if you’re unsure or uncomfortable with adjusting the brakes yourself.
How to Identify Brake Issues in Your Golf Cart
If you own a golf cart, it’s important to ensure that its brakes are working effectively. Identifying brake issues early on can prevent accidents and costly repairs down the line. Here are some key signs to watch out for:
Squeaking or squealing noises
If you hear high-pitched sounds when applying the brakes, it could indicate worn-out brake pads or shoes. This is a common issue that needs immediate attention.
Vibrations or pulsations
When braking, if you feel vibrations through the steering wheel or pedal, it may be due to warped rotors. This can affect your ability to stop efficiently and should be addressed promptly.
Soft or spongy pedal
A brake pedal that feels mushy or sinks too easily when pressed indicates a potential problem with the hydraulic system, such as air in the lines or leaking fluid.
Uneven braking
If your golf cart pulls to one side while braking, it suggests uneven brake pad wear or problems with calipers. This imbalance can compromise your control over the vehicle.
Warning lights
Modern golf carts often have warning lights on their dashboards to alert drivers of any malfunctioning systems, including brakes. Pay attention to these indicators and take appropriate action if they illuminate.
Steps to Properly Adjust the Brakes on Your Golf Cart
To ensure your golf cart operates smoothly and safely, it’s important to regularly adjust its brakes. Here are the steps you need to follow:
What Tools Do You Need for Adjusting Golf Cart Brakes?
Adjusting the brakes on your golf cart is an important maintenance task that helps ensure smooth and safe operation. To get started, you’ll need a few essential tools. Let’s take a look at what you’ll need to adjust your golf cart brakes effectively.
Wrench set
A set of wrenches, both open-end and adjustable, will be necessary to loosen and tighten various bolts during the adjustment process. Make sure you have different sizes available to accommodate different parts of the brake system.
Screwdriver
Having a screwdriver with both flathead and Phillips head options is crucial for manipulating screws or fasteners in your golf cart’s brake assembly.
Brake spoon tool
This specialized tool allows you to adjust the star wheel mechanism found in drum brakes without causing damage. It makes adjusting the tension between the brake shoes and drum much easier.
Jack stands
Safety should always be a priority when working on your golf cart’s brakes. Use jack stands to securely lift and support your vehicle while performing adjustments, preventing accidents or injuries.
Brake cleaner
Keeping your brake components clean is essential for optimal performance. A can of brake cleaner helps remove dirt, debris, and any existing lubricants from key areas such as calipers or drums before making adjustments.
Common Mistakes to Avoid When Adjusting Golf Cart Brakes
Adjusting the brakes on your golf cart is an important maintenance task that ensures safe and smooth operation. However, there are some common mistakes that many people make when attempting to adjust their golf cart brakes. By being aware of these mistakes and avoiding them, you can save yourself time, money, and potential headaches down the road.
One of the most common mistakes is not properly cleaning or lubricating the brake components before making adjustments. Dirt, debris, and lack of lubrication can cause the brakes to stick or not function optimally. To prevent this issue, take the time to thoroughly clean all brake parts and apply a suitable lubricant as recommended by the manufacturer.
Another mistake is adjusting only one side of the brakes instead of both sides simultaneously. It’s crucial to adjust both sides evenly to ensure balanced braking power. Failing to do so can lead to uneven wear on brake pads or shoes and result in poor braking performance.
Additionally, over-tightening or under-tightening the adjustment nut is a mistake that should be avoided. Over-tightening can cause excessive friction and premature wear on brake components while under-tightening may result in inadequate stopping power. Follow your golf cart’s manual for specific torque specifications when adjusting the nuts.
Lastly, neglecting regular inspections after adjusting your golf cart brakes is another error many people make. Even if you’ve made proper adjustments initially, it’s essential to periodically check for any signs of wear or damage such as thinning brake pads or leaking fluid.
When Should You Seek Professional Help for Brake Adjustment?
If you’re wondering when it’s time to seek professional help for brake adjustment, here are a few key indicators to consider. First and foremost, if you notice any unusual noises coming from your brakes, such as squeaking or grinding sounds, it’s important to have them checked by a professional. These noises could be an indication of worn brake pads or other issues that require immediate attention.
Another sign that you should seek professional help is if your brake pedal feels spongy or goes all the way to the floor before engaging. This could be a sign of air in the brake lines or a problem with the master cylinder. In either case, it’s crucial to have this addressed promptly for your safety on the road.
Additionally, if you experience vibrations or pulsations when braking, especially at higher speeds, it may be time for a professional inspection. Vibrations can indicate warped rotors or uneven wear on the brake pads, both of which can compromise stopping power and overall performance.
Lastly, if you’ve noticed that your vehicle takes longer to come to a complete stop than usual or if you feel like your brakes aren’t as responsive as they used to be, it’s wise to schedule an appointment with a professional technician. They will have the expertise and tools necessary to diagnose any underlying issues and make the necessary adjustments.
Remember that properly functioning brakes are essential for safe driving. If any of these signs sound familiar or if you simply feel uncertain about your brake system’s condition, don’t hesitate – consult with a qualified mechanic who can ensure that everything is in proper working order.
Signs That Indicate It’s Time For Professional Brake Adjustment:
- Unusual noises like squeaking or grinding
- Spongy brake pedal
- Vibrations while braking
- Extended stopping distance or decreased responsiveness
FAQs
Q: What tools are needed to adjust golf cart brakes?
A: To adjust golf cart brakes, you will need a wrench or pliers, a jack to lift the cart off the ground, and possibly a screwdriver depending on the type of brake system.
Q: How do you know if your golf cart brakes need adjusting?
A: If your golf cart is taking longer to stop or if you notice any dragging or squeaking noises when applying the brakes, it may be an indication that your brakes need adjusting.
Q: How do you adjust drum brakes on a golf cart?
A: To adjust drum brakes on a golf cart, start by lifting the rear wheels off the ground with a jack. Then locate the adjustment nut on each brake assembly and turn it clockwise until there is slight resistance when spinning the wheel.
Q: How do you adjust disc brakes on a golf cart?
A: Adjusting disc brakes on a golf cart involves turning an adjustment bolt located near the caliper. Start by loosening this bolt slightly and then pump the brake pedal several times to ensure proper alignment before tightening it back up.


