How To Attach Decorations To A Golf Cart?
Ready to jazz up your golf cart with some fun decorations? Whether it’s for a special event or just to show off your personality, decking out your golf cart can be an exciting project.
Attaching decorations to a golf cart is quite straightforward. It involves selecting suitable adornments, securing them properly, and ensuring they don’t obstruct the driver’s view or interfere with the vehicle’s operation.
Stick around as we break down each step in detail! You’ll be turning heads at the golf course in no time with your creatively decorated ride.
Key Takeaways
- Securely fasten decorations to your golf cart for a standout look.
- Utilize adhesive hooks or clips to ensure decorations stay in place.
- Consider the weight and size of decorations to avoid any damage while driving.
- Regularly check and readjust attachments to maintain their stability throughout your golf cart adventures.
different types of decorations that can be attached to a golf cart
If you’re looking to add some flair and personality to your golf cart, there are various types of decorations that can be attached. Let’s explore the different options available:
Decals
These adhesive stickers come in a wide range of designs and patterns, allowing you to customize your golf cart with ease. From sports team logos to funny phrases, decals are a popular choice for adding a touch of personalization.
Wraps
Similar to decals, wraps cover the entire surface of the golf cart with a printed design or image. They offer more versatility as they can completely transform the appearance of your cart, making it stand out on the course.
Lights
LED lights can be installed on your golf cart to enhance its visibility during evening rounds or add an eye-catching element during special events. You can choose from various colors and lighting patterns to create a unique look.
Seat Covers
Upgrading your seat covers is another way to add style and comfort to your golf cart. Whether you prefer leather, patterned fabric, or personalized embroidery, there are plenty of options available to suit your taste.
Wheel Accessories
Jazz up the wheels of your golf cart by adding accessories such as hubcaps or wheel covers in different styles and finishes. This simple addition can instantly elevate the overall appearance of your vehicle.
Windshield Decals
A windshield decal not only adds visual interest but also serves as an additional layer of protection against sun glare and wind while driving around the course.
Flags and Pennants
Show off your favorite sports team or country flag by attaching it securely onto a flagpole mounted on your golf cart’s rear end.
Custom Paint Job
For those who want something truly unique, consider getting a custom paint job for your golf cart! With endless possibilities in terms of colors and designs, your cart will surely turn heads.
How to properly prepare the golf cart for attaching decorations?
Decorating your golf cart can add a touch of personal style and make it stand out on the course. But before you start attaching decorations, it’s important to properly prepare your golf cart. Here are some essential steps to ensure a successful decorating experience:
Step 1: Clean and Inspect
Before adding any decorations, give your golf cart a thorough cleaning. Remove any dirt, dust, or debris from the exterior surfaces. Inspect the cart for any damage or loose parts that may need repair before applying decorations.
Step 2: Choose Suitable Attachments
When selecting decorations for your golf cart, consider their suitability for outdoor use and compatibility with your specific model. Opt for lightweight materials that won’t weigh down the cart or cause any safety hazards while driving.
Step 3: Securely Fasten Decorations
To prevent decorations from falling off during rides, it’s crucial to secure them properly. Use durable adhesive tapes or fasteners designed specifically for outdoor applications. Avoid obstructing windows, lights, mirrors, or other vital components of the golf cart.
Step 4: Test Drive
Once you’ve attached all the desired decorations securely, take your golf cart on a test drive at low speeds to ensure everything stays in place. Pay close attention to how the added weight affects handling and stability.
Which tools and materials are needed for attaching decorations to a golf cart?
If you’re looking to add some flair to your golf cart, attaching decorations can be a fun way to personalize it. To get started, you’ll need a few essential tools and materials.
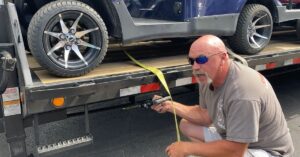
Firstly, adhesive hooks or clips are handy for attaching lightweight decorations such as banners or streamers. These hooks can easily be attached to the frame of your golf cart without causing any damage. Additionally, zip ties are useful for securing larger items like balloons or signs.
To ensure that your decorations stay in place while driving, double-sided tape is an excellent option. This tape provides a strong hold and is ideal for attaching lightweight items directly onto the surface of the golf cart.
For more elaborate decorations or those that require additional support, consider using suction cups with hooks. These versatile tools can be attached to windows or other smooth surfaces on your golf cart.
Lastly, if you plan on decorating with lights, make sure you have enough electrical tape and extension cords on hand. Electrical tape will help secure the wiring in place while extension cords allow flexibility in positioning the lights around your golf cart.
In summary, when it comes to attaching decorations to your golf cart, having adhesive hooks or clips, zip ties, double-sided tape, suction cups with hooks, electrical tape, and extension cords will provide you with all the necessary tools and materials needed for a successful decoration project.
Step-by-step guide on how to attach decorations securely to a golf cart.
So, you’ve decided to spruce up your golf cart and add some decorations. Whether it’s for a special event or just to add a personal touch, attaching decorations securely is essential. Here’s a step-by-step guide to help you achieve that:
Clean the surface
Before attaching any decorations, make sure the surface of your golf cart is clean and free from dirt and debris. Use mild soap and water to wash the areas where you plan to place the decorations.
Choose suitable materials
Opt for sturdy materials that can withstand outdoor conditions such as wind, rain, and sunlight. Adhesive hooks or strips are often the best choice as they provide a strong hold without causing damage.
Plan your placement
Take some time to visualize where you want each decoration before applying them. Consider both aesthetics and practicality – ensure they won’t obstruct your view while driving or interfere with any moving parts of the cart.
Apply adhesive hooks/strips
Gently remove the backing from the adhesive hooks or strips and firmly press them onto the desired locations on your golf cart. Make sure they are evenly spaced apart for balance.
Attach decorations
Once all hooks/strips are in place, carefully hang or attach your chosen decorations onto them one by one. Be mindful of their weight – avoid heavy items that could potentially fall off during movement.
Remember, safety should always be a priority when decorating your golf cart! Avoid obstructing lights or mirrors, as well as anything that could potentially distract other drivers on the course.
Tips and tricks for maintaining and removing decorations from a golf cart without causing damage.
Decorating your golf cart can be a fun way to personalize it and showcase your style. However, when the time comes to remove those decorations, you want to ensure that you do so without causing any damage. Here are some tips and tricks to help you maintain and remove decorations from your golf cart safely:
Clean the Surface
Before applying any decorations, make sure the surface of your golf cart is clean and free from dirt or debris. This will help adhesive materials stick better and prevent any residue from being left behind when removing them.
Use Non-Damaging Adhesive Options
When choosing adhesive materials for attaching decorations, opt for non-damaging options such as removable tapes or adhesives specifically designed for temporary use on surfaces like cars or carts. Avoid using strong adhesives that could leave marks or damage the paintwork.
Test in an Inconspicuous Area
Before applying any decoration all over your golf cart, test it in a small inconspicuous area first to ensure it doesn’t cause any adverse reactions or damage to the surface.
Remove with Care
When it’s time to take down the decorations, do so carefully by peeling them off slowly and gently. If there is resistance or if they’re not coming off easily, try using heat (such as a hairdryer) to loosen the adhesive before attempting removal again.
Clean Up Residue
After removing the decorations, there may be some residue left behind on the surface of your golf cart. To clean this up without causing damage, use mild soap and water along with a soft cloth or sponge. Avoid using harsh chemicals that could strip away paint or finish.
FAQs
Q: What are some ways to attach decorations to a golf cart?
A: One way is to use suction cups with hooks, which can easily be attached to the cart’s windshield or roof. Another option is using zip ties or bungee cords to secure decorations onto the frame of the golf cart.
Q: Can magnets be used to attach decorations?
A: Yes, magnets can be a convenient option for attaching lightweight decorations such as signs or flags. Simply place adhesive-backed magnets on the back of the decoration and affix them securely to the metal parts of the golf cart.
Q: Are there any specific tools needed for attaching decorations?
A: While not necessarily required, having a drill with appropriate bits can come in handy when installing brackets or hooks onto the golf cart. Additionally, zip ties and bungee cords may require scissors or wire cutters for trimming excess length.
Q: How do I ensure that my decorations stay in place while driving?
A: To prevent your decorations from falling off during movement, it is important to double-check that all attachments are secure before driving. Tug gently on each attachment point and make any necessary adjustments or reinforcements if needed.


