How To Repaint A Golf Cart?
Are you tired of your old, drab golf cart and itching to give it a fresh, new look? Well, the good news is that you don’t have to spend a fortune on buying a brand-new one. The solution lies right in your hands – repainting!
Repainting your golf cart isn’t as daunting as it sounds. All it takes is some preparation, the right tools, quality paint and a bit of patience. By following systematic steps, you can easily breathe new life into your golf cart.
Want to know more about how this works? Stick around for some easy-to-follow tips that will not only help you revamp your ride but also make heads turn at the golf course!
Key Takeaways
- Prep is key: Before starting the repainting process, thoroughly clean and sand your golf cart to ensure a smooth and long-lasting finish.
- Choose the right paint: Opt for automotive-grade paint specifically designed for outdoor use to withstand the elements and provide a professional-looking result.
- Don’t skip priming: Apply a high-quality primer to create an even base coat that enhances paint adhesion and improves color vibrancy.
- Take your time with application: Use steady, overlapping strokes when applying the paint, allowing each layer to dry completely before adding another for a flawless finish.
necessary steps to prepare a golf cart for repainting
If you’re looking to give your golf cart a fresh new look, repainting is a great option. However, before you dive into the painting process, there are several essential steps that need to be taken in order to ensure a successful and long-lasting paint job.
Firstly, start by thoroughly cleaning the entire surface of the golf cart. Remove any dirt, grime, or residue using soap and water or a suitable cleaner. This step is crucial as it helps create a clean canvas for the paint to adhere to.
Next, inspect the cart for any dents or scratches. If you come across any imperfections on the body of the golf cart, take care of them by sanding down rough areas and filling in deep scratches with appropriate filler material. This will help create an even surface for painting.
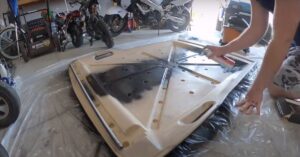
After addressing any repairs needed on the bodywork, it’s time to focus on preparing the existing paint finish. Start by lightly sanding down the entire surface using fine-grit sandpaper. This step helps remove any glossiness from previous coats of paint and creates texture for better adhesion.
Once you have sanded down the paint finish, wipe away all dust particles with a clean cloth or tack cloth. It’s important to ensure that no debris remains on the surface before moving forward.
To further enhance adhesion and promote durability of your new paint job, consider applying a primer coat specifically designed for automotive surfaces. A high-quality primer will not only provide better coverage but also help prevent peeling or chipping in the future.
How do you select the appropriate paint for your golf cart?
Consider the Material
Golf carts are typically made of either fiberglass or metal. It’s important to choose a paint that is suitable for the specific material of your cart. For fiberglass, look for paints that are designed to adhere well and provide excellent coverage. On the other hand, if you have a metal cart, opt for paints that offer rust protection and durability.
Evaluate Durability
Golf carts are exposed to various weather conditions and rough terrains on the golf course. Therefore, it’s crucial to select a paint that can withstand these elements without chipping or fading easily. Look for paints labeled as “weather-resistant” or “UV-protected” as they tend to last longer.
Color Selection
While aesthetics may not be at the top of your priority list when choosing paint for your golf cart, it’s still an important consideration. Decide whether you want a bold color that stands out or prefer something more subtle and classic. Additionally, consider how well the chosen color will complement any existing decals or accessories on your cart.
Ease of Application
Unless you’re hiring professionals to repaint your golf cart, ease of application should be taken into account when selecting paint. Look for paints that come with clear instructions and require minimal preparation work before application.
techniques used to properly prepare the surface of a golf cart before painting
Properly preparing the surface of a golf cart before painting is essential to achieve a smooth and long-lasting finish. By following a few simple techniques, you can ensure that your paint job looks professional and withstands the test of time.
Firstly, start by thoroughly cleaning the surface of the golf cart. Remove any dirt, grime, or old paint using soap and water or a mild detergent. Scrub gently with a soft brush or sponge to avoid scratching the surface.
Next, it’s important to remove any rust or corrosion from metal parts. Use sandpaper or a wire brush to gently scrape away rust until you reach bare metal. Apply a rust converter if necessary to prevent further corrosion.
After cleaning and removing any rust, take some time to repair any dents or scratches on the surface. Fill in small imperfections with automotive body filler and smooth it out using sandpaper. Larger dents may require professional assistance for proper repair.
Once all repairs are complete, it’s time for priming! Apply an automotive primer specifically designed for use on metal surfaces. This will create an even base for your paint and improve adhesion.
Finally, before applying your chosen paint color, make sure to sand down the primed surface with fine-grit sandpaper. This step helps create a smooth finish by removing any imperfections left behind during priming.
By following these prepping techniques – cleaning thoroughly, removing rust, repairing damages, priming, and sanding – you’ll be well on your way towards achieving a flawless paint job on your golf cart!
some effective painting techniques to ensure a smooth and professional finish on your golf cart
When it comes to painting your golf cart, using the right techniques can make all the difference in achieving a smooth and professional finish. Let’s explore some effective painting techniques that will help you transform your golf cart into a work of art.
Surface Preparation
Before you start painting, proper surface preparation is crucial. Begin by cleaning the surface thoroughly with soap and water to remove any dirt or debris. Next, sand down any rough areas or imperfections to ensure a smooth base for the paint to adhere to. Finally, apply a primer coat to promote better adhesion and enhance durability.
Choosing the Right Paint
Selecting high-quality automotive paint specifically designed for exterior applications is essential for achieving professional results. Consider using enamel-based paints as they offer excellent coverage and durability suitable for outdoor use. Additionally, opt for spray paint instead of brush-on paint for a smoother finish.
Applying Thin Coats
To avoid drips, sags, or uneven texture on your golf cart’s surface, it’s important to apply thin coats of paint rather than one thick coat. Start with light passes from left to right or up and down while maintaining an even distance between the spray nozzle and the surface.
Sanding Between Coats
After each coat has dried completely (according to manufacturer instructions), lightly sand the painted surface with fine-grit sandpaper (around 400-600 grit). This step helps remove any imperfections such as dust particles or orange peel texture while promoting better adhesion between layers.
Clear Coat Application
For added protection and shine, consider applying a clear coat after allowing sufficient drying time for your final color coats. Clear coats act as a barrier against UV rays, chemicals, scratches, and weather elements while providing a glossy finish that enhances the overall appearance of your golf cart.
How can you add final touches and maintain the newly painted look of your golf cart?
Once you’ve given your golf cart a fresh coat of paint, it’s important to take steps to preserve its newly painted look. By implementing some simple finishing touches and maintenance practices, you can ensure that your golf cart remains in pristine condition for years to come.
Firstly, consider applying a clear coat over the paint job. This protective layer acts as a shield against dirt, debris, and UV rays that can cause fading or damage. A clear coat also adds an extra glossy finish to enhance the overall appearance of your golf cart.
Another crucial step is regular cleaning. Use mild soap and water to gently wash away any dirt or stains on the surface. Avoid using harsh chemicals or abrasive materials that could scratch or dull the paintwork. Additionally, make sure to dry your golf cart thoroughly after each wash to prevent water spots.
Investing in quality wax can significantly extend the lifespan of your newly painted golf cart. Apply a thin layer of wax using a soft cloth or applicator pad, following the manufacturer’s instructions carefully. The wax will create a protective barrier that repels dust and moisture while enhancing shine.
To keep your wheels looking their best, clean them regularly with wheel cleaner specifically designed for chrome or alloy wheels. Be mindful not to use any abrasive products that may scratch or damage the wheel surface.
Lastly, don’t forget about proper storage when not in use. If possible, park your golf cart indoors or under cover to protect it from harsh weather conditions such as rain, snow, and direct sunlight. Consider investing in a breathable cover specifically designed for golf carts if indoor storage is not an option.
FAQs
Q: What should I do before repainting a golf cart?
A: Before repainting a golf cart, it is important to thoroughly clean the surface using soap and water. Remove any rust or old paint by sanding or using a chemical stripper. Finally, mask off any areas that you don’t want to be painted.
Q: Which type of paint is best for repainting a golf cart?
A: For repainting a golf cart, it is recommended to use automotive-grade acrylic enamel or urethane paint. These paints are durable and provide a high-quality finish. Make sure to choose a color that suits your preference and matches the desired look of your golf cart.
Q: How should I apply the new paint to my golf cart?
A: To achieve an even coat of paint on your golf cart, it is best to use spray equipment such as an HVLP (High Volume Low Pressure) spray gun. Apply multiple thin coats rather than one thick coat for better adhesion and smoother finish. Allow each coat to dry completely before applying the next one.
Q: Any tips for ensuring a professional-looking repaint job on my golf cart?
A: To ensure a professional-looking repaint job on your golf cart, take time in preparing the surface properly by removing all dirt, grease, and debris. Sanding between coats can also help achieve smooth results. Additionally, applying clear coat after painting will protect the new finish from scratches and UV damage while providing added shine.


![How much does it cost to paint a golf cart? [Answered] Untitled design (29)](https://giftedgolfers.com/wp-content/uploads/2023/08/Untitled-design-29-300x157.jpg)


